When you log into EBS shape, it displays the main screen.
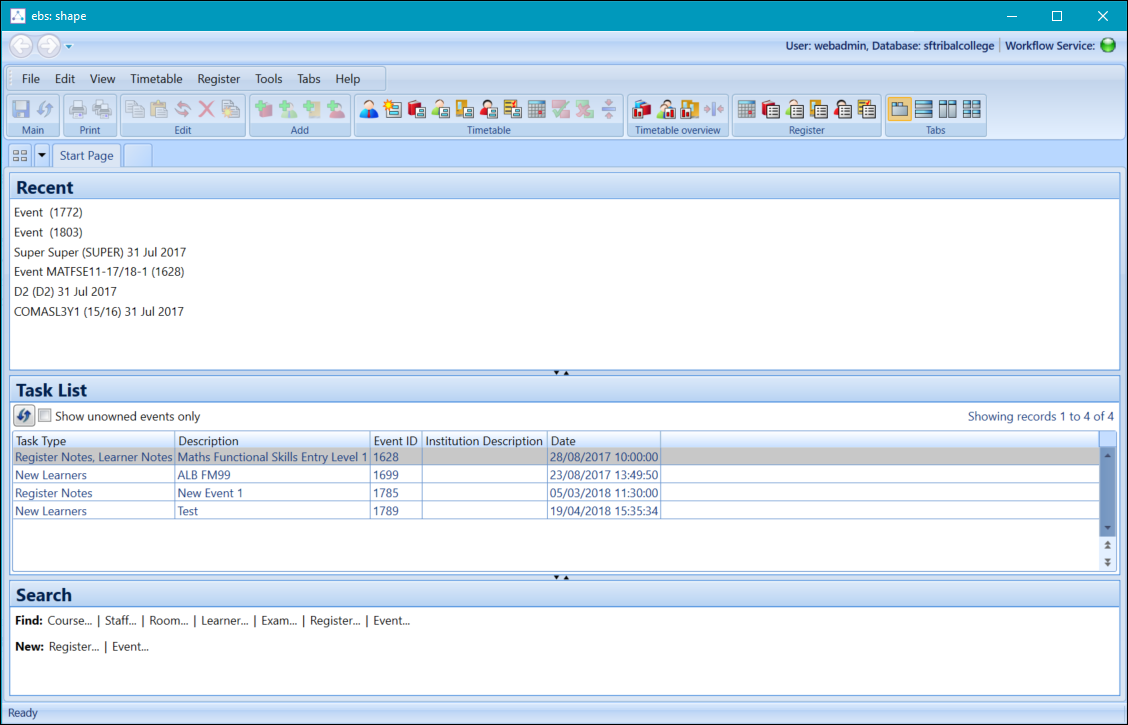
In the user interface, you can:
Use the forward and backward buttons to navigate to and from recent screens.
You can view a full list of recent screens by clicking the drop-down button.

The drop-down menu gives you access to various options in Shape. Some of these options are only available when undertaking various tasks and will not be available on all screens.
The following drop-downs are available:
-
File drop-down
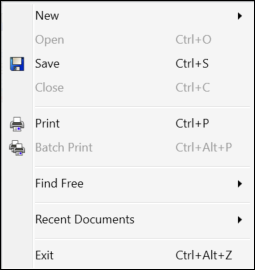
The options in the File drop-down are described in the following table.
-
Edit drop-down
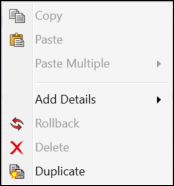
The options in the Edit drop-down are described in the following table.
| Menu | Description |
|---|---|
| Copy | Copies a chosen event. This option is greyed out until an event is selected on the timetable grid. |
| Paste | Pastes the copied event into the earliest slot available on the first day of the week. This option is greyed out until an event has been copied. |
| Paste Multiple | Pastes the copied event 1-10 times depending on the selected sub-menu option. This option is greyed out until an event has been copied. |
| Add Details | Allows a Course, Staff, Room or Learner to be added to an event depending on the selected sub-menu option. This option is greyed out until an event is opened or selected on the timetable grid. |
| Rollback | Rolls back the system to the last saved state. This option is greyed out until an event is opened. |
| Delete |
Deletes the event. This option is greyed out until an event has been selected. |
| Duplicate |
Duplicates the event. This option is greyed out until an event has been opened. |
-
View drop-down
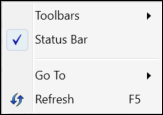
The options in the View drop-down are described in the following table.
| Menu | Description |
|---|---|
| Toolbars | Toggle to turn groups of icons on or off. |
| Status Bar | Toggle to turn the status bar at the bottom of the screen on or off. |
| Go To | Navigates Back. Forward or to the Start Page depending on the selected sub-menu. |
| Refresh | Refreshes the currently viewed screen. |
-
Timetable drop-down
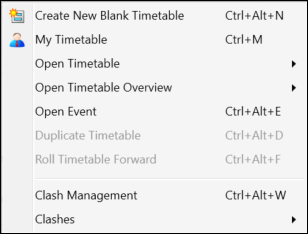
The options in the Timetable drop-down are described in the following table.
| Menu | Description |
|---|---|
| Create New Blank Timetable | Opens the New Timetable screen. |
| My Timetable | Opens the timetable for the logged in user. |
| Open Timetable | Opens the Course, Staff, Room, Learner or Exam timetable search. |
| Open Timetable Overview | Opens the Course, Staff or Room timetable overview search. |
| Open Event | Opens the Event search. |
| Duplicate Timetable | Allows the user to copy the current timetable layout and copy it to another course, room or staff member. This option is greyed out until a timetable is opened. |
| Roll-Forward Timetable | Allows the user to roll forward a Course, Staff or Room timetable layout into
another session. This option is greyed out until a timetable is opened. |
| Clash Management | Open the Clash Management screen where clashes can be viewed, corrected and accepted. |
| Clashes | Allows the user to mark clashes as Acceptable or Unacceptable depending
on the selected sub-menu. This option is greyed out until the Clash Management screen is opened. |
-
Register drop-down
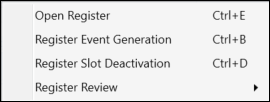
The options in the Register drop-down are described in the following table.
| Menu | Description |
|---|---|
| Open Register | Open the Register search. |
| Register Event Generation | Open the Register Event Generation screen where events can be created for courses set up for register event generation. |
| Register Slot Deactivation | Opens the Register Slot Deactivation screen where register slots can be deactivated globally. |
| Register Review | Opens the Course, Staff, Room, Learner or Exam Register Review screen depending on the selected sub-menu. |
-
Tools drop-down

The options in the Tools drop-down are described in the following table.
| Menu | Description |
|---|---|
| Manage Learner Groups | Open the Learner Group Management screen where users can manage course groups. |
| Options | Allows the user to configure the timetable view. |
| Restore System Defaults | Restores system defaults from those set by the user in the Option screen. |
-
Tabs drop-down
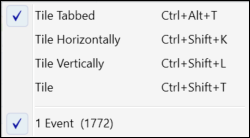
The options in the Tabs drop-down are described in the following table.
| Menu | Description |
|---|---|
| Tile Tabbed | Displays the current opened timetables in a tabbed format. |
| Tile Horizontally | Displays the current opened timetables in a horizontally tiled format. |
| Tile Vertically | Displays the current opened timetables in a vertically tiled format. |
| Tile | Displays the current opened timetables in a tiled format. |
| Start Page | Returns the user to the Start page. |
-
Help drop-down

The options in the Help drop-down are described in the following table.
| Menu | Description |
|---|---|
| Contents | Displays the Home Page for the Online Help system. |
| About | Displays the System information regarding this screen. |
The ribbon is designed to help you to quickly find the commands needed to complete a task. Ribbon commands are organised in groups, shown as tabs.
To use a command on the ribbon tab, click on that command with the mouse. All commands on the ribbon also have an associated access key, allowing them to be accessed directly from the keyboard.
To use the access keys or to see the keyboard shortcuts available, move the cursor over the appropriate toolbar button. You will then see small labels appear against the toolbar button. An example of this is shown in the following graphic:

The Recent pane will display recent search results allowing you to quickly navigate to previous screens from the Start Page.
Click on a search result to open it.

When the list has reached its maximum, viewing a new one will push the least-recently viewed one off the list.
The Task List pane displays a list of outstanding tasks. Tasks are created when one of the following changes occur on the register in Ontrack Staff Hub:
- A new learner is added
- A note is added against a learner
- A note is added against the register
- A progress status is changed against a learner

The Search pane allows quick access to the following searches:
- Course
- Staff
- Room
- Learner
- Exam
- Register
- Event
It also allows you to quickly create a new register or event.
